
 Pin it
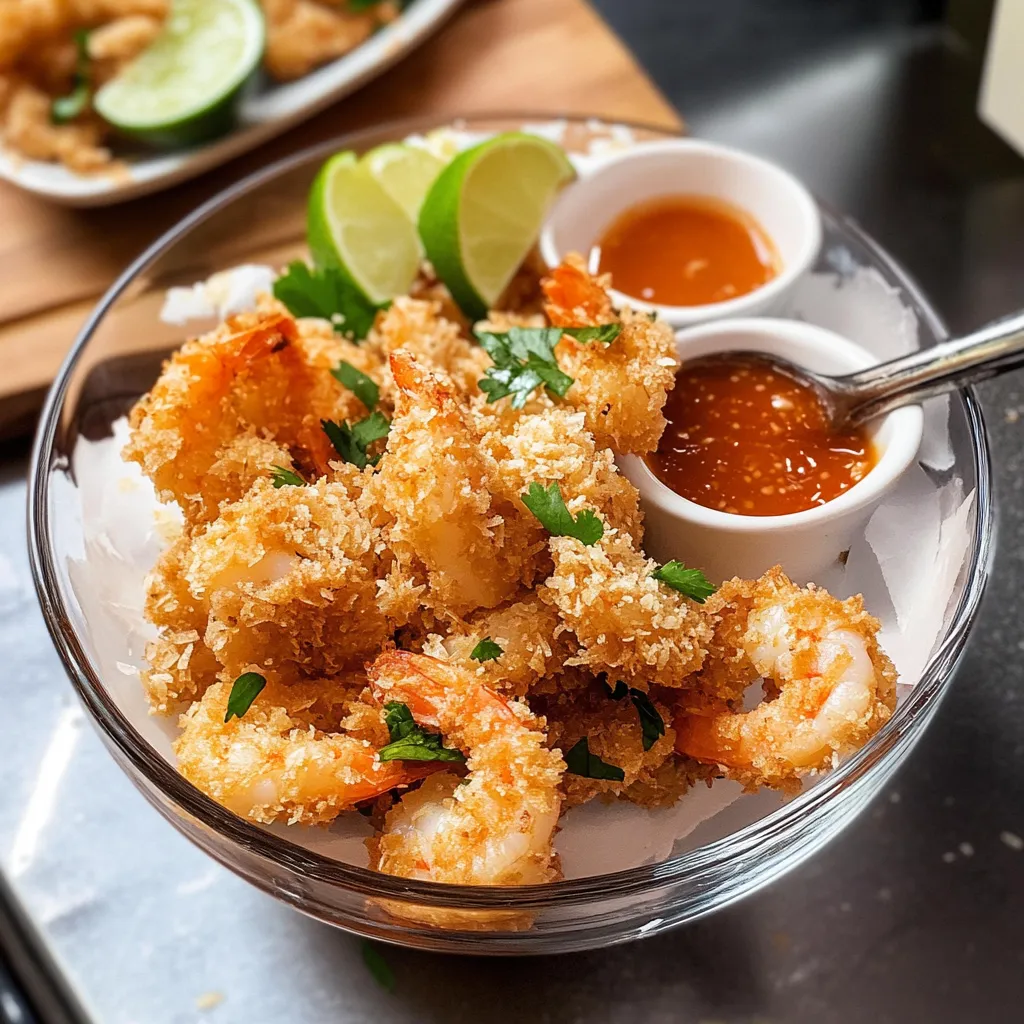
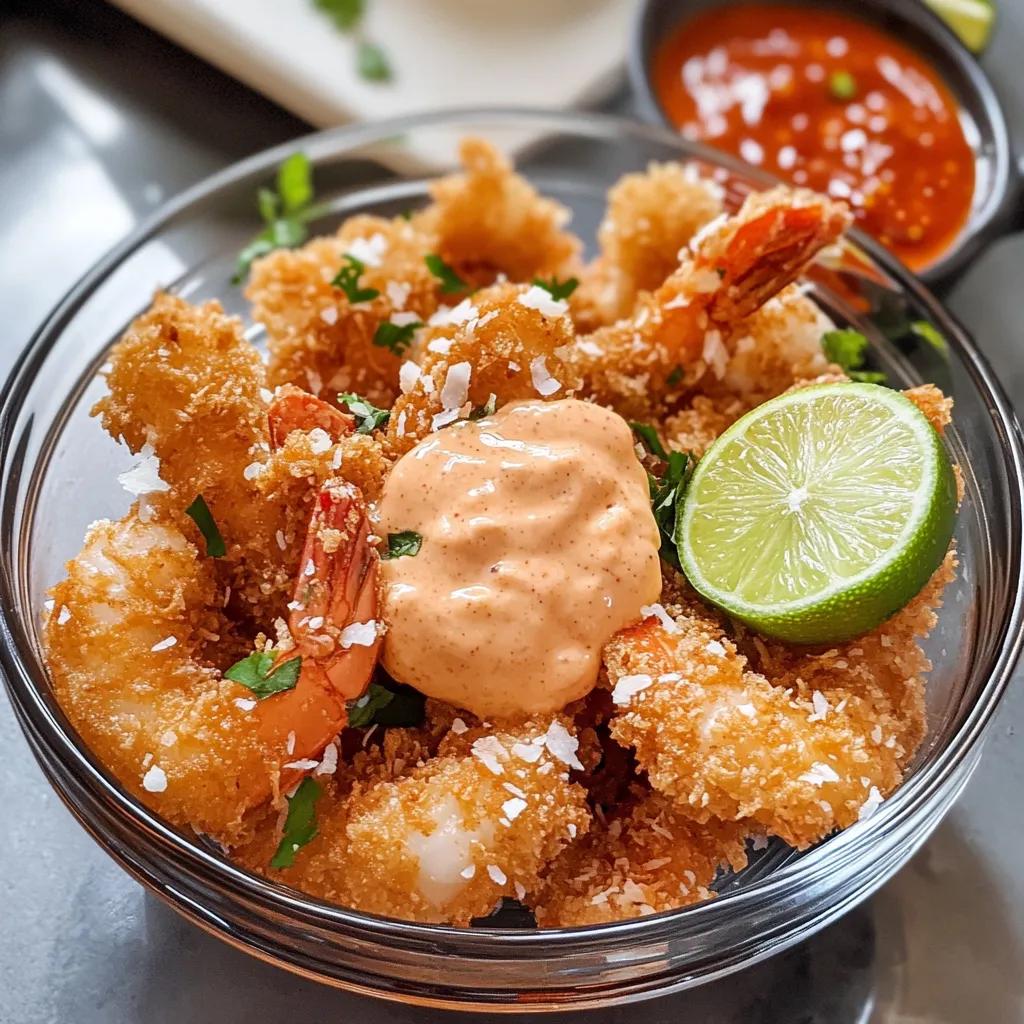
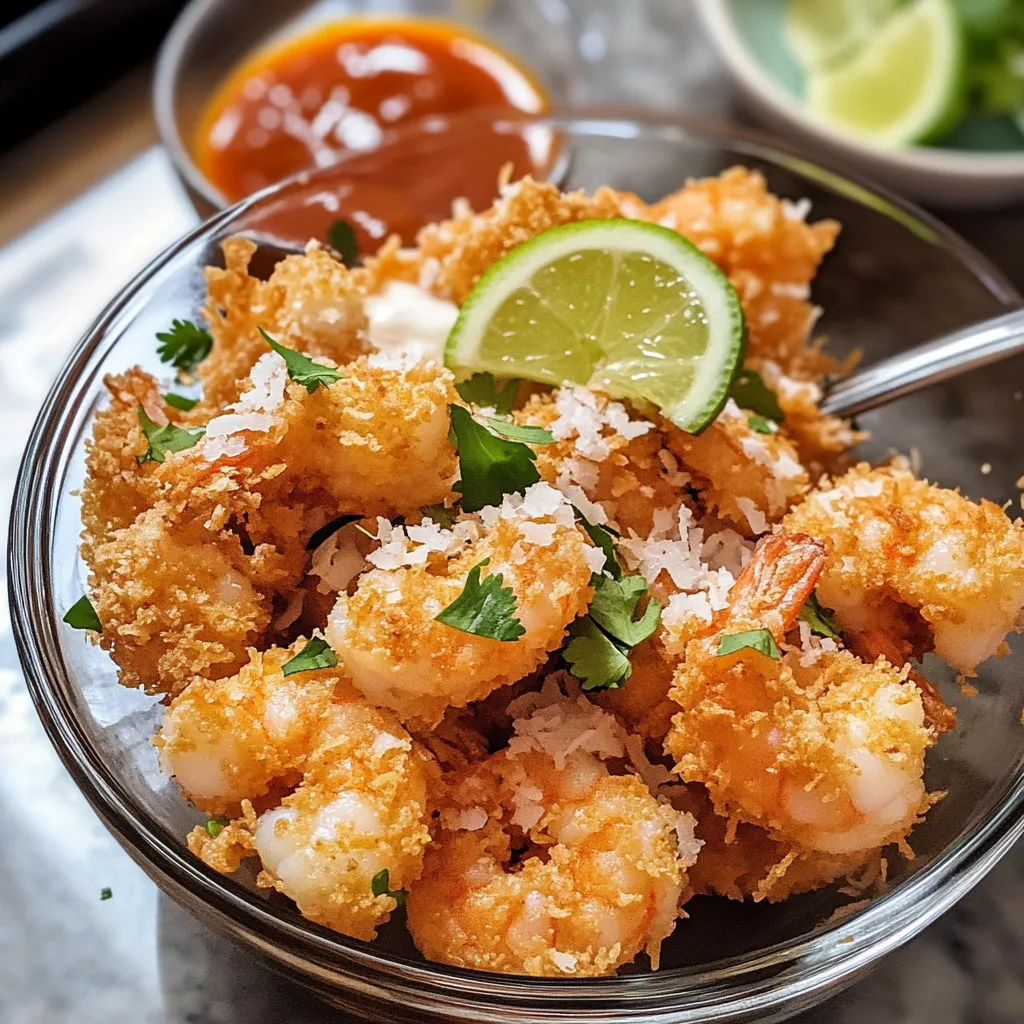
This crispy coconut shrimp recipe delivers restaurant-quality results right in your home kitchen. The combination of crunchy panko, sweet coconut, and tender shrimp creates an irresistible texture contrast that's elevated by a spicy-sweet dipping sauce. Whether served as an appetizer or main course, these golden morsels disappear quickly.
I developed this recipe after a memorable beach vacation where we splurged on coconut shrimp almost daily. After multiple test batches in my home kitchen, this version actually surpassed the restaurant original that inspired it.
Ingredients
- Extra large or jumbo shrimp: These larger sizes provide the best meat-to-coating ratio and won't overcook as quickly as smaller varieties
- Rice flour: Creates an exceptionally light and crispy coating that regular flour can't match
- Unsweetened coconut flakes: Provides natural sweetness without becoming cloying like sweetened varieties
- Panko breadcrumbs: Japanese-style breadcrumbs that stay crispier longer than regular breadcrumbs
- Baking powder: The secret ingredient that ensures your coating bubbles up with incredible lightness
- Kewpie mayo: Japanese mayonnaise with a richer egg flavor that makes the dipping sauce luxuriously creamy
- Thai sweet chili sauce: Balances heat with sweetness for an addictive dipping experience
- Fresh lime: Both zest and juice brighten all the flavors and cut through the richness
- Neutral oil: Choose one with a high smoke point like vegetable, canola, or peanut oil
Step-by-Step Instructions
- Prepare the batter:
- Whisk eggs, rice flour, water, baking powder, lime zest, and seasonings until smooth. The consistency should resemble pancake batter, thick enough to cling to the shrimp but thin enough to allow excess to drip off. This base layer creates the perfect foundation for the coconut coating to adhere to.
- Create the coating mixture:
- Combine unsweetened coconut flakes and panko breadcrumbs in a shallow dish, mixing well to ensure even distribution. This combination provides the perfect balance of sweetness from the coconut and crunch from the panko.
- Dredge the shrimp:
- Hold each shrimp by the tail and dip into the batter, allowing excess to drip off before pressing into the coconut mixture. Use your fingers to gently press the coating onto all surfaces of the shrimp, ensuring complete coverage except for the tail handle. Work methodically to keep one hand dry for handling the coating.
- Freeze before frying:
- Place the breaded shrimp in the freezer for at least 20 minutes. This critical step firms up the coating and chills the shrimp, preventing them from overcooking before the coating turns golden brown. The contrast between cold shrimp and hot oil creates the perfect crispy exterior.
- Mix the dipping sauce:
- Combine Kewpie mayo, sweet chili sauce, Sriracha, lime juice, and grated garlic in a small bowl. The creamy base balances the heat from the Sriracha while the garlic and lime add complexity. Adjust seasonings to your preference, making it spicier or more tangy as desired.
- Heat the oil properly:
- Pour oil to a depth of 1-2 inches in a heavy-bottomed pan or Dutch oven. Heat to exactly 350°F using a thermometer for precision. Maintaining this temperature ensures the coating browns perfectly while the shrimp cooks through without becoming rubbery.
- Fry in small batches:
- Carefully lower 4-5 shrimp into the hot oil, being careful not to overcrowd. Cook until the coating turns golden brown and crispy, about 1-2 minutes per side. The actual cooking time depends on the size of your shrimp, but you're looking for a rich golden color rather than timing exactly.
- Drain and season immediately:
- Transfer cooked shrimp to a paper towel-lined rack and sprinkle with flaky sea salt while still hot. The salt adheres better to warm food and enhances all the flavors. Serve immediately with the dipping sauce, garnished with fresh herbs and lime wedges.
 Pin it
The freezing step might seem unnecessary but it's actually the key to the perfect texture. I learned this technique from a Florida seafood restaurant chef who shared that commercial kitchens always freeze their breaded shrimp before frying. The first time I tried this method at home, the difference was remarkable even my picky brother-in-law who claims to dislike coconut devoured these.
Make-Ahead Options
While the fried shrimp are best enjoyed immediately, you can prepare them up to the freezing stage well in advance. The breaded, uncooked shrimp can remain in the freezer for up to 24 hours before frying. This makes them perfect for entertaining since all the messy prep work can be completed earlier in the day. Simply transfer the frozen shrimp directly to the hot oil when guests arrive, adding just an extra 30 seconds to the cooking time.
Perfect Pairings
These coconut shrimp work beautifully as both an appetizer or main course. For a complete meal, serve them alongside a bright citrus salad with avocado and a simple coconut rice. The acidity in the salad cuts through the richness of the fried shrimp while the rice echoes the tropical coconut theme.
Pro Tips
Keep your oil at a steady temperature by frying in small batches and allowing it to recover between additions
 Pin it
Now you can bring the taste of your favorite seafood restaurant home anytime!
Frequently Asked Questions
- → Can I make these coconut shrimp in an air fryer?
Yes! Preheat your air fryer to 375°F, arrange the breaded shrimp in a single layer, spray with cooking spray, and cook for about 5 minutes, turning halfway through. Larger shrimp may need 1-2 minutes more, while smaller shrimp might cook faster.
- → Why do you freeze the shrimp before frying?
Freezing the breaded shrimp for at least 20 minutes helps the coating adhere better and prevents the shrimp from overcooking when they hit the hot oil. This step ensures a perfectly crispy exterior while maintaining tender, juicy shrimp inside.
- → How can I make this dish gluten-free?
This dish is easy to make gluten-free by simply substituting regular panko with gluten-free panko breadcrumbs. The recipe already calls for rice flour instead of all-purpose flour, which is naturally gluten-free.
- → Can I prepare the coconut shrimp ahead of time?
Yes, you can bread the shrimp up to 24 hours in advance and store them in the refrigerator. You can also freeze the breaded, uncooked shrimp on a baking sheet, then transfer to a freezer bag for up to 2 months. When ready to cook, fry directly from frozen, adding an extra minute or two to the cooking time.
- → What can I serve with coconut shrimp?
Coconut shrimp pairs wonderfully with the included sweet chili sauce, but also works well with other dipping options like mango salsa or pineapple sauce. For a complete meal, serve with coconut rice, a tropical slaw, or a fresh green salad with citrus dressing.
- → How long do leftover coconut shrimp stay good?
Leftover cooked shrimp can be stored in an airtight container in the refrigerator for up to 3 days. Reheat them gently in a pan with a little oil or in the oven at 375°F until warmed through. Keep in mind that seafood generally has a shorter shelf-life than poultry or meat.