
 Pin it
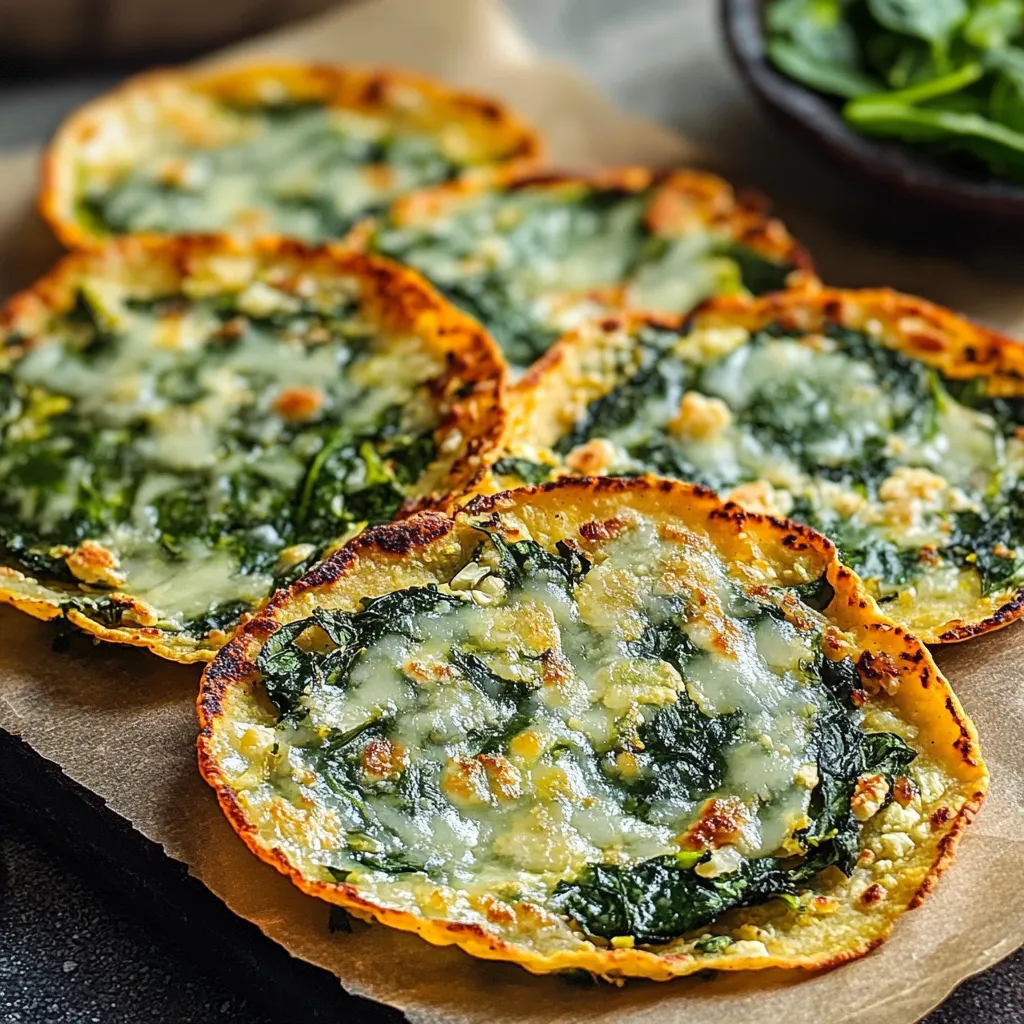
These Cauliflower Spinach Taco Shells transform everyday vegetables into a versatile vessel for all your favorite taco fillings. The mild, slightly nutty flavor of cauliflower pairs beautifully with earthy spinach, creating a nutritious base that's sturdy enough to hold your fillings yet tender enough to fold. Each shell offers a perfect balance of vegetable goodness and cheesy satisfaction, with a hint of garlic that complements rather than overwhelms whatever fillings you choose.
Ingredients
- Cauliflower (1 Medium Head, Riced): Creates a light, nutritious base with a mild flavor.
- Fresh Spinach (1 Cup, Finely Chopped): Adds color, nutrients, and a subtle earthy taste.
- Large Eggs (2): Help bind the ingredients together for the perfect texture.
- Shredded Mozzarella Cheese (½ Cup): Melts beautifully, adding creamy richness.
- Salt (½ Teaspoon): Enhances the natural flavors of all the ingredients.
- Black Pepper (¼ Teaspoon): Provides subtle warmth and depth.
- Garlic Powder (½ Teaspoon): Infuses a savory, aromatic flavor into each bite.
Step-by-Step Instructions
- Preheat the Oven
- Set the oven to 375°F (190°C) and line a baking sheet with parchment paper.
- Prepare the Cauliflower
- Rice the cauliflower in a food processor, microwave for 5 minutes, then squeeze out excess moisture.
- Mix the Ingredients
- Combine riced cauliflower, chopped spinach, eggs, mozzarella, salt, black pepper, and garlic powder.
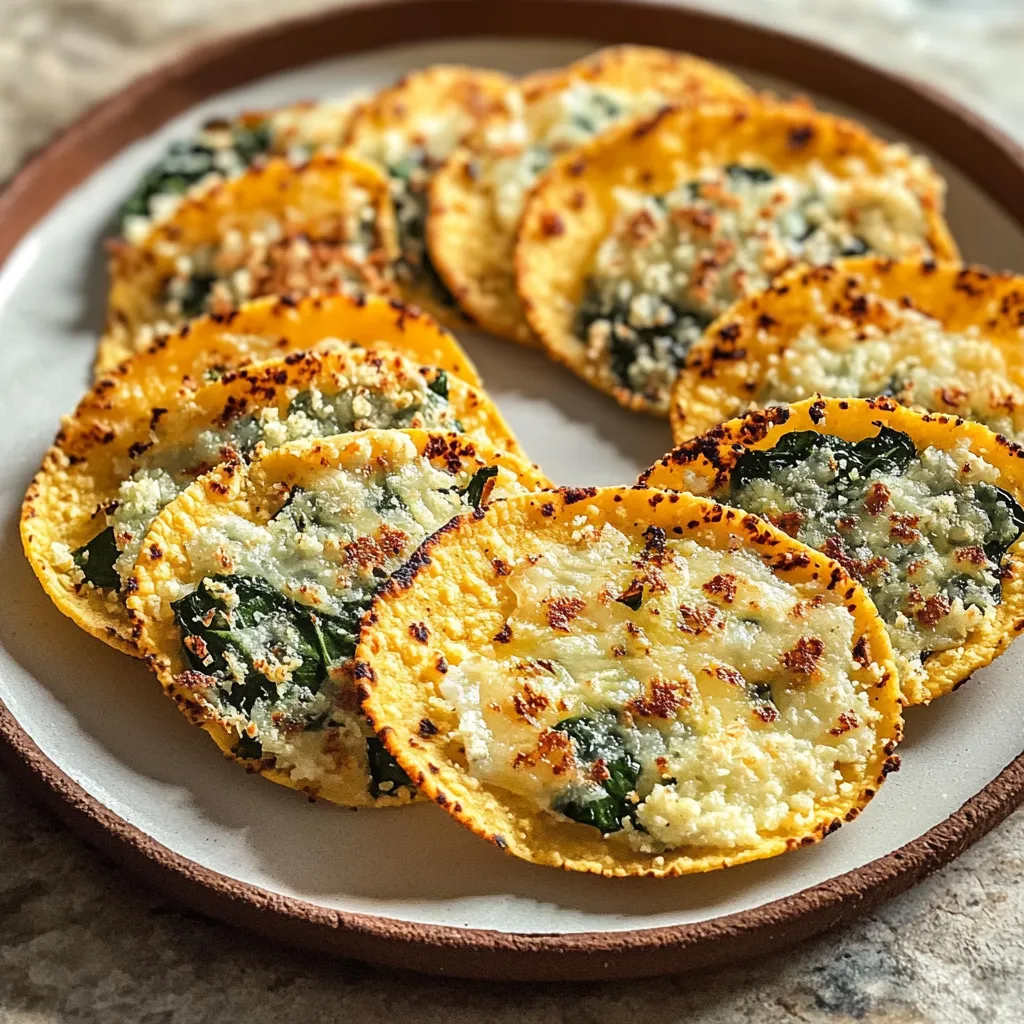
- Shape the Shells
- Form the mixture into 6-inch circles on the baking sheet.
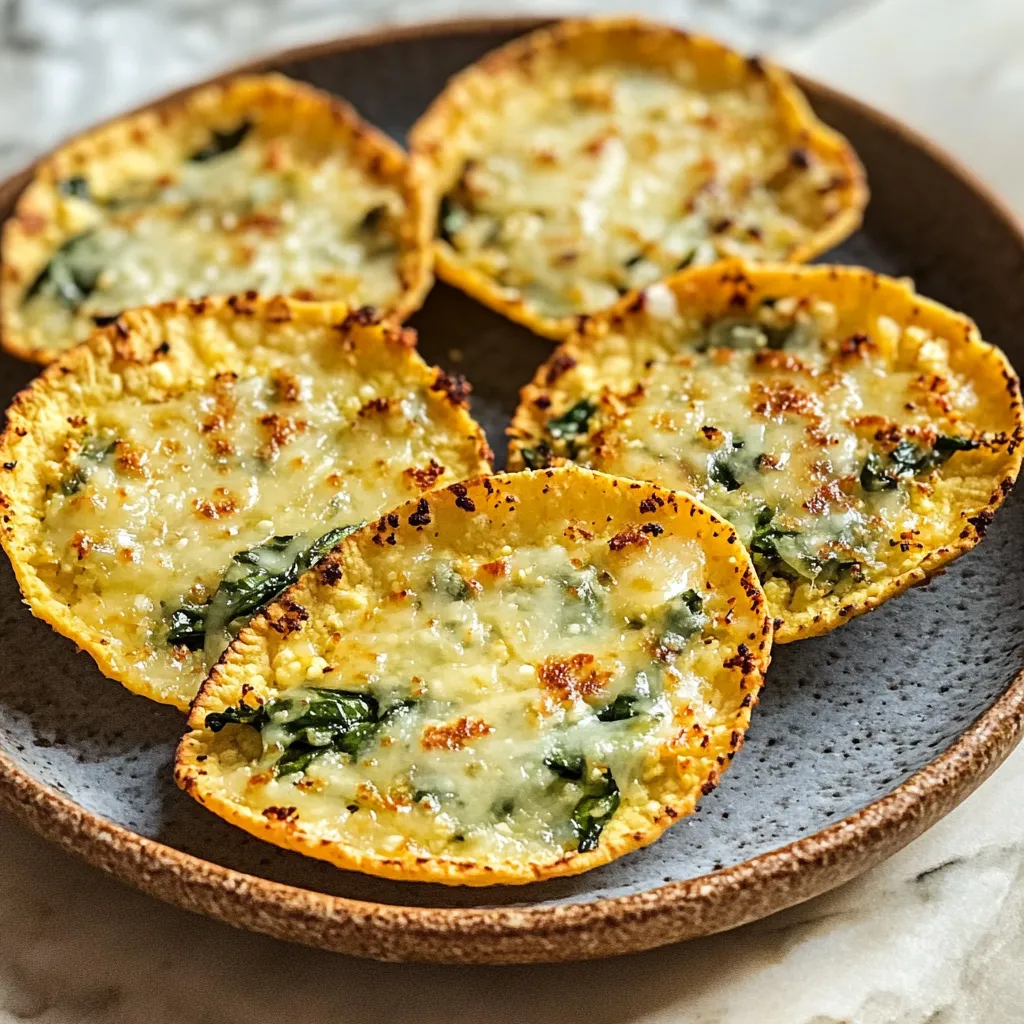
- Bake Until Firm
- Bake for 15-20 minutes until golden brown.
- Cooling Period
- Let cool for 5 minutes before removing from parchment paper.
 Pin it
Beyond Taco Tuesday
These shells work well beyond just tacos. Try them for breakfast wraps, low-carb pizza bases, or even as a sandwich substitute. Their mild flavor pairs well with various cuisines, making them a versatile kitchen staple.
The Make-Ahead Magic
These shells can be refrigerated for up to five days or frozen with parchment between each shell for easy reheating. This makes meal prep a breeze and ensures a quick, healthy option anytime.
Unexpected Entertaining Hero
Perfect for dinner parties with dietary restrictions, these shells make an excellent gluten-free, keto-friendly option that even guests without dietary needs will enjoy.
Seasonal Adaptations
Change the flavors seasonally by adding fresh herbs, sun-dried tomatoes, or warming spices to suit different fillings throughout the year.
 Pin it
I discovered this recipe when searching for a gluten-free option for my husband. After perfecting the technique, my kids now cheer when they see cauliflower in the grocery cart. It’s proof that vegetables can be both nutritious and delicious!
Frequently Asked Questions
- → Why is it important to squeeze the moisture out of the cauliflower?
- Removing excess moisture from the cauliflower is crucial for achieving crispy shells that hold together. If you skip this step, the shells will be soggy and may fall apart when filled with taco ingredients.
- → Can I make these taco shells ahead of time?
- Yes, you can prepare these shells up to 2 days in advance. Store them in an airtight container in the refrigerator with parchment paper between layers. Reheat them in a 350°F oven for 5-7 minutes until warm and crisp before serving.
- → What fillings work best with cauliflower taco shells?
- These shells work well with both traditional and creative taco fillings. Try ground beef or turkey with taco seasoning, grilled chicken or fish, roasted vegetables, black beans, avocado, fresh salsa, and a dollop of Greek yogurt instead of sour cream.
- → Can I freeze these cauliflower taco shells?
- Yes, you can freeze these shells for up to 3 months. Place them in a single layer on a baking sheet to freeze initially, then transfer to a freezer bag with parchment paper between layers. Reheat from frozen in a 375°F oven for 10-12 minutes.
- → What can I use instead of mozzarella cheese?
- Any good melting cheese will work in this recipe. Try cheddar, Monterey Jack, or a Mexican cheese blend. For a dairy-free option, you can use dairy-free cheese alternatives, but you may need to add a tablespoon of almond flour to help bind the mixture.