
 Pin it
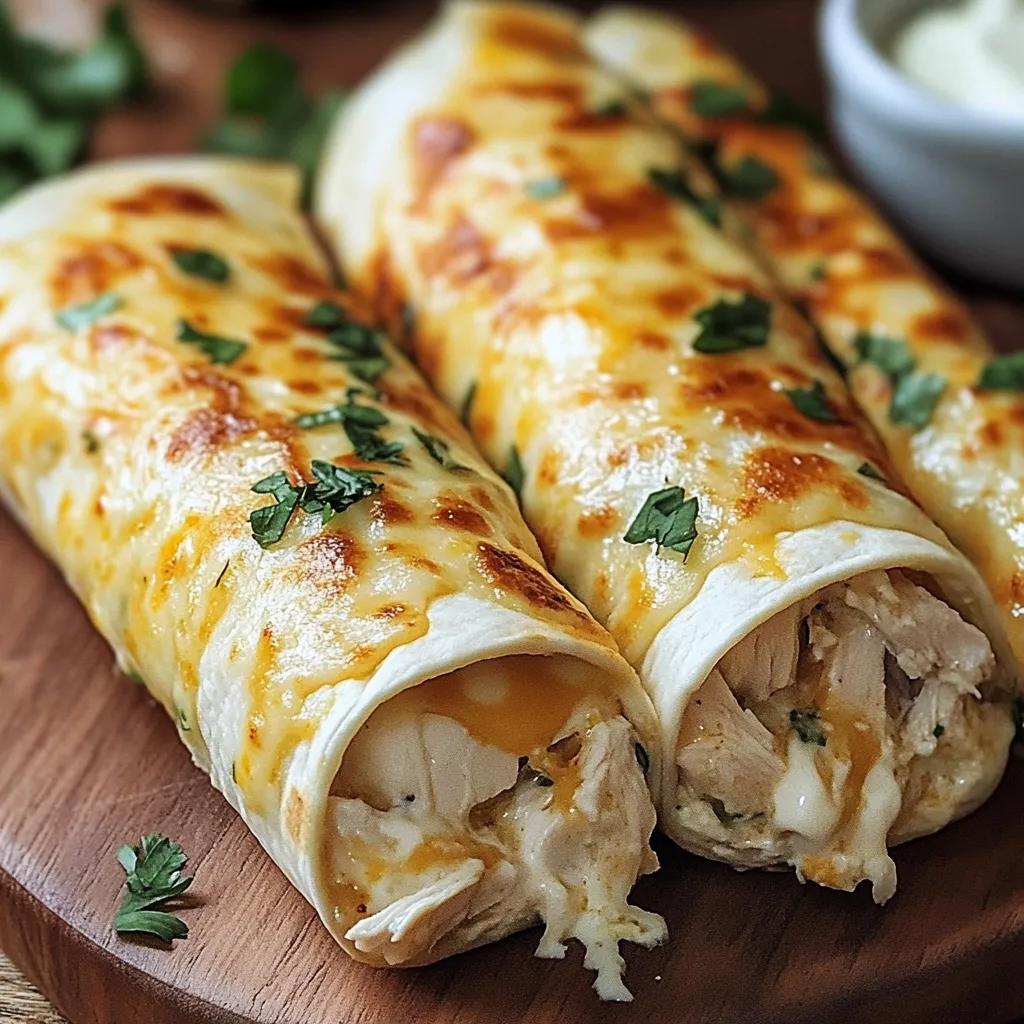
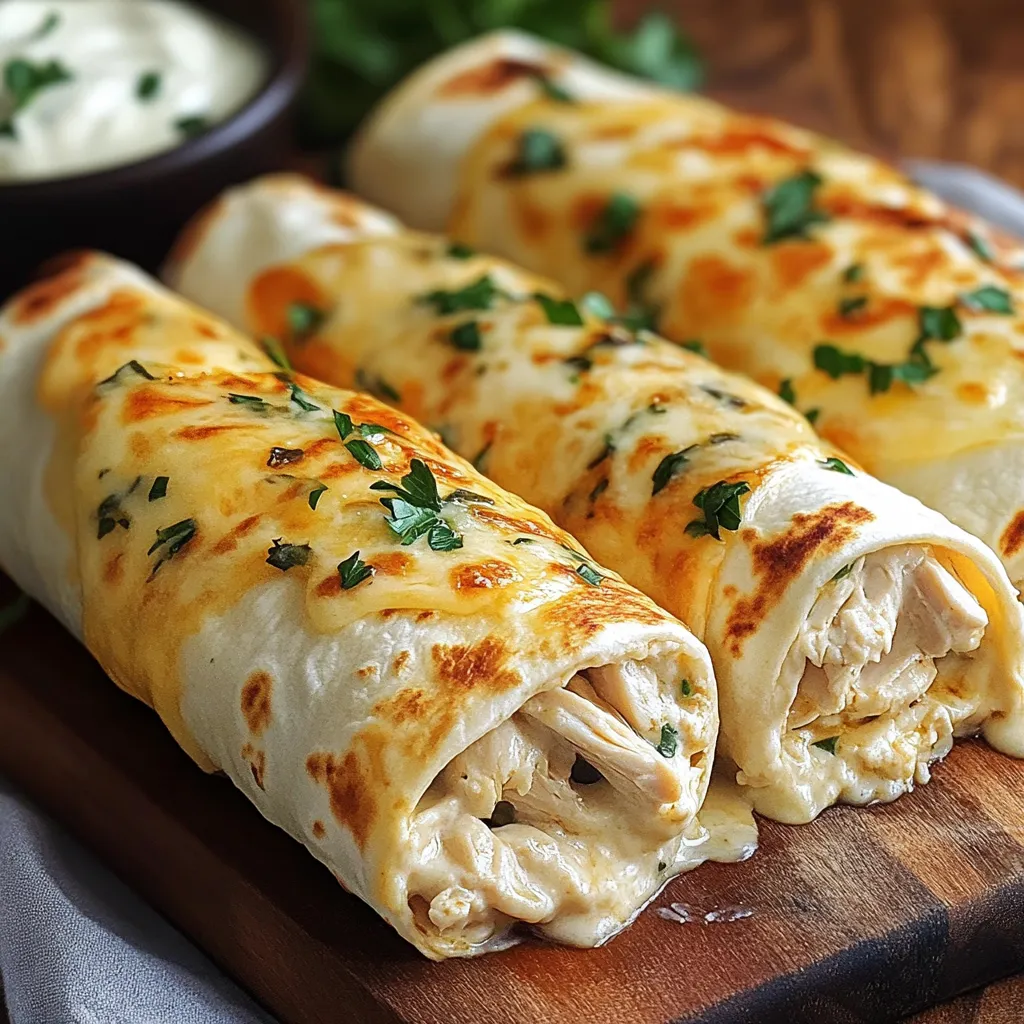
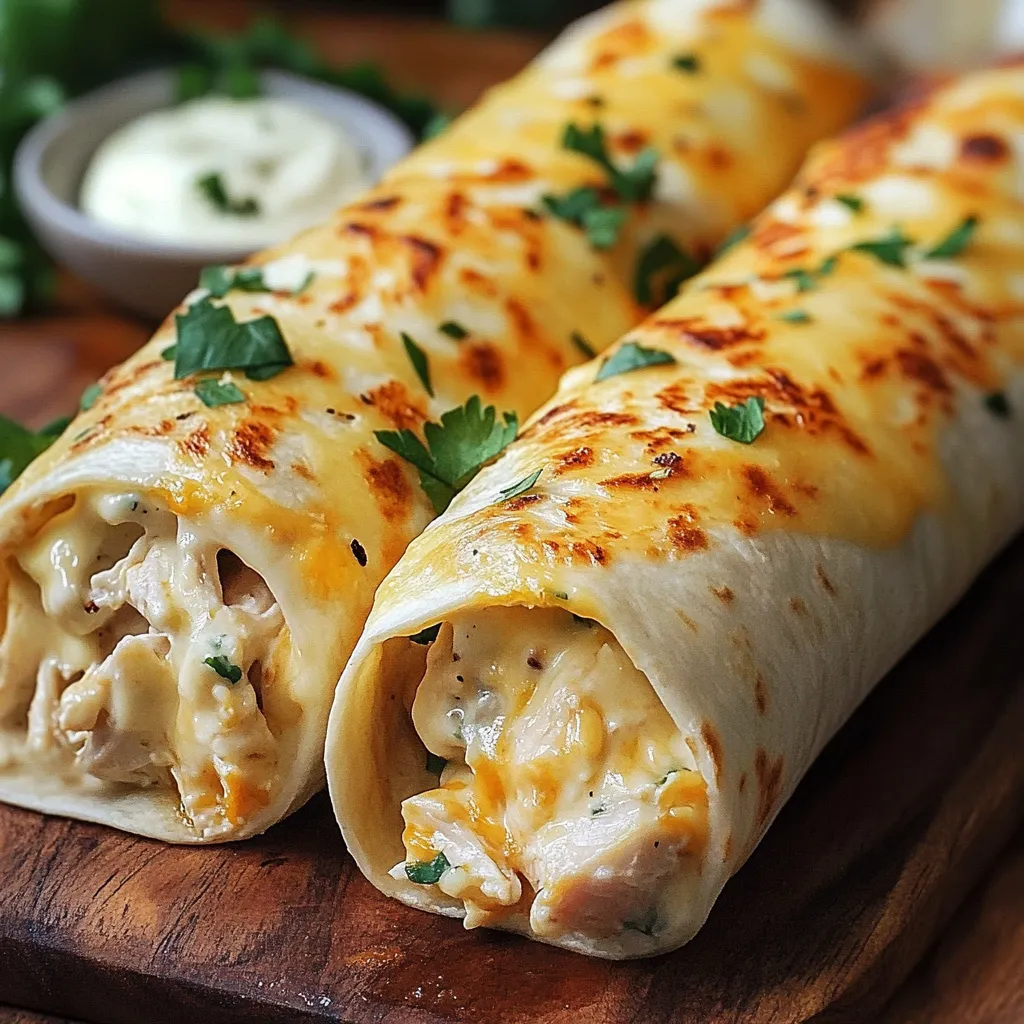
This cheesy garlic chicken wrap recipe has become my weeknight salvation when I need something quick but still packed with flavor. The combination of creamy, cheesy filling with perfectly seasoned chicken creates a meal that satisfies both adults and picky eaters alike.
I first created these wraps when I needed to use up leftover rotisserie chicken. My family was so impressed they requested them three times the following week. Now they're part of our regular rotation.
Ingredients
- Shredded cooked chicken: Provides the protein foundation, choose rotisserie for convenience or leftover grilled chicken for extra flavor
- Mozzarella cheese: Melts beautifully and creates that irresistible cheese pull
- Cream cheese: Adds richness and helps bind everything together, use full fat for the best texture
- Sour cream: Brings tanginess that balances the richness, look for thick cultured sour cream
- Fresh minced garlic: Infuses the filling with aromatic flavor, always use fresh not jarred for the best taste
- Chopped parsley: Brightens the flavor profile and adds color
- Paprika: Adds subtle smoky depth and beautiful color
- Salt and pepper: Balance and enhance all other flavors
- Large flour tortillas: Create the perfect vessel, choose burrito size for easier wrapping
- Mixed salad greens: Add freshness and nutritional value
- Olive oil: Helps achieve that perfectly crispy exterior
Step-by-Step Instructions
- Prepare the filling:
- Combine shredded chicken, mozzarella, cream cheese, sour cream, garlic, parsley, paprika, salt and pepper in a large mixing bowl. Mix thoroughly with a spatula ensuring the cream cheese is evenly distributed throughout. This creates the perfect creamy consistency where every bite contains all flavors.
- Assemble the wraps:
- Lay each tortilla flat and place approximately half cup of filling in the center, forming a horizontal line but leaving about two inches of space on all sides. This proper positioning ensures successful folding. Add a small handful of mixed greens on top of the chicken mixture for freshness and texture.
- Master the fold:
- Start by folding the sides of the tortilla inward over the filling, then bring the bottom edge up and over the filling. Continue rolling upward, keeping the sides tucked in while maintaining firm pressure for a tight wrap. The key is applying even pressure without tearing the tortilla.
- Achieve the perfect crisp:
- Heat a nonstick skillet over medium heat and add just enough olive oil to coat the surface. Place wraps seam side down first, which seals them closed. Cook for exactly 3 minutes per side, watching carefully for golden browning. The exterior should become crispy while the interior turns perfectly melty.
 Pin it
The minced garlic is truly the heart of this recipe. I discovered this when I once made them without it and the flavor was noticeably flatter. My daughter now helps mince the garlic when we make these together, something she proudly calls her special contribution to family dinner night.
Make Ahead Options
These wraps shine as a meal prep option. You can prepare the filling up to three days ahead and store it covered in the refrigerator. For even quicker assembly during busy weeknights, I sometimes portion the filling into single-serving containers. The wraps can also be fully assembled but not cooked ahead of time, just wrap them individually in parchment paper and refrigerate. When ready to enjoy, simply crisp them in the skillet as directed.
Clever Substitutions
This recipe welcomes creative adaptations based on what you have available. Turkey, ham, or even seasoned tofu can replace chicken for different protein options. For a lower-carb version, swap the flour tortillas for large lettuce leaves, though you will lose the crispy exterior. Dairy-free? Use plant-based cream cheese, vegan sour cream and your favorite dairy-free shredded cheese. The texture will be slightly different but still delicious. If you like heat, add a diced jalapeño or chipotle pepper to the filling.
Serving Suggestions
While these wraps are perfectly satisfying on their own, I love creating a complete meal around them. A simple side salad with vinaigrette complements the richness of the wraps. For a heartier option, serve alongside sweet potato fries or a light vegetable soup. When entertaining, I sometimes cut the wraps into pinwheels secured with toothpicks for an easy appetizer version. A cooling cucumber and tomato salad with lemon juice makes a refreshing counterpoint to the warm wraps.
 Pin it
With just a few simple steps, these wraps can transform an ordinary weeknight dinner into something truly special.
Frequently Asked Questions
- → Can I prepare these wraps ahead of time?
Yes! You can prepare the chicken-cheese filling up to 24 hours in advance and store it in the refrigerator. When ready to serve, simply assemble and cook the wraps. You can also fully assemble the uncooked wraps and store them in the refrigerator for up to 4 hours before cooking.
- → What can I substitute for cream cheese?
Greek yogurt makes an excellent substitute for cream cheese in this dish. You'll get a similar creaminess with a bit more tang and less fat. Mascarpone cheese or ricotta would also work well, though they'll create a slightly different flavor profile.
- → How do I keep my wraps from falling apart?
Make sure not to overfill your tortillas. When folding, tuck in the sides first, then roll from bottom to top, keeping it tight. If needed, you can secure with toothpicks before cooking (just remember to remove them before serving). Cooking seam-side down first helps seal the wrap closed.
- → Can I make these wraps vegetarian?
Absolutely! Replace the chicken with sautéed vegetables like bell peppers, zucchini, and mushrooms. You could also use plant-based chicken alternatives, chickpeas, or even scrambled eggs for a vegetarian protein option.
- → What are some good side dishes to serve with these wraps?
These wraps pair well with a fresh garden salad, coleslaw, potato chips, sweet potato fries, or a light soup. For a more substantial meal, serve with a side of roasted vegetables or a grain-based salad like quinoa with vegetables.
- → Can I bake these instead of pan-frying?
Yes! To bake, preheat your oven to 375°F (190°C), place the assembled wraps on a baking sheet, brush lightly with olive oil, and bake for 15-20 minutes until golden and crispy, flipping halfway through.