
 Pin it
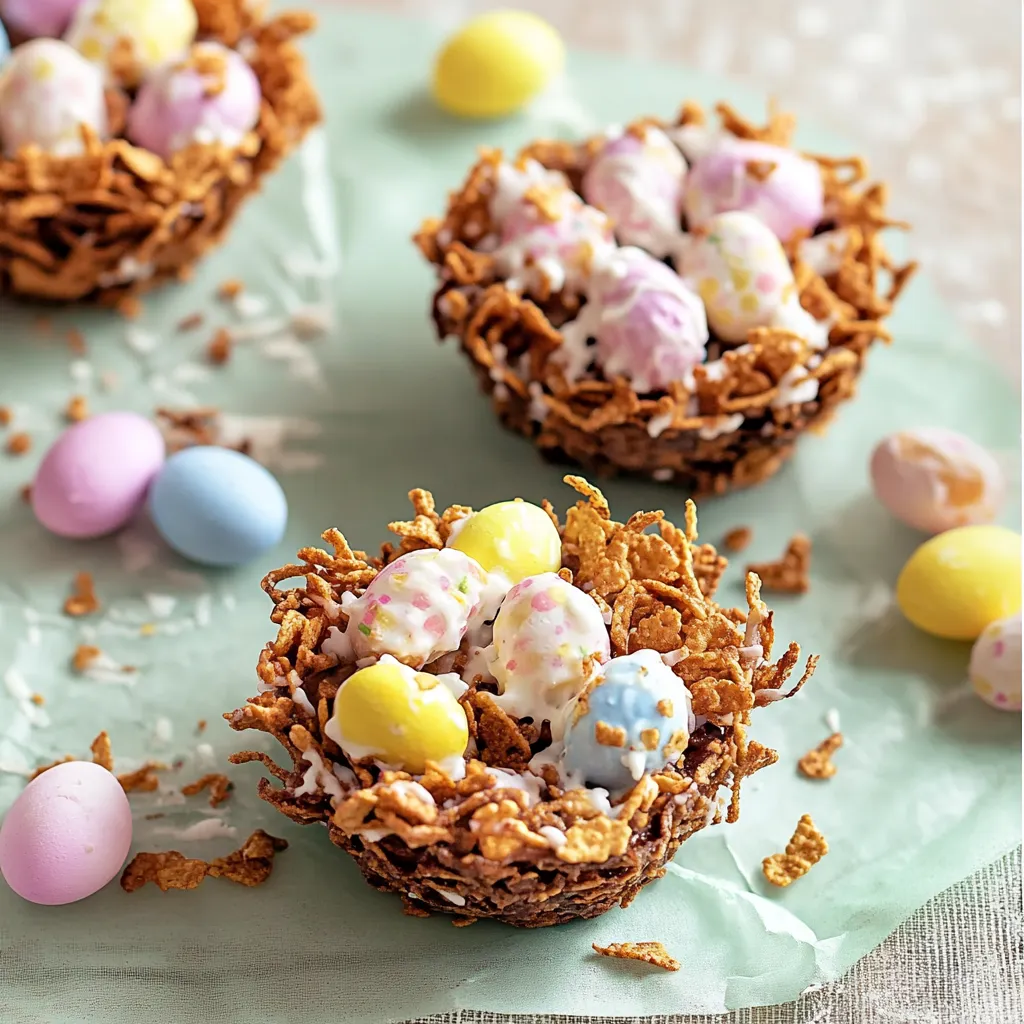
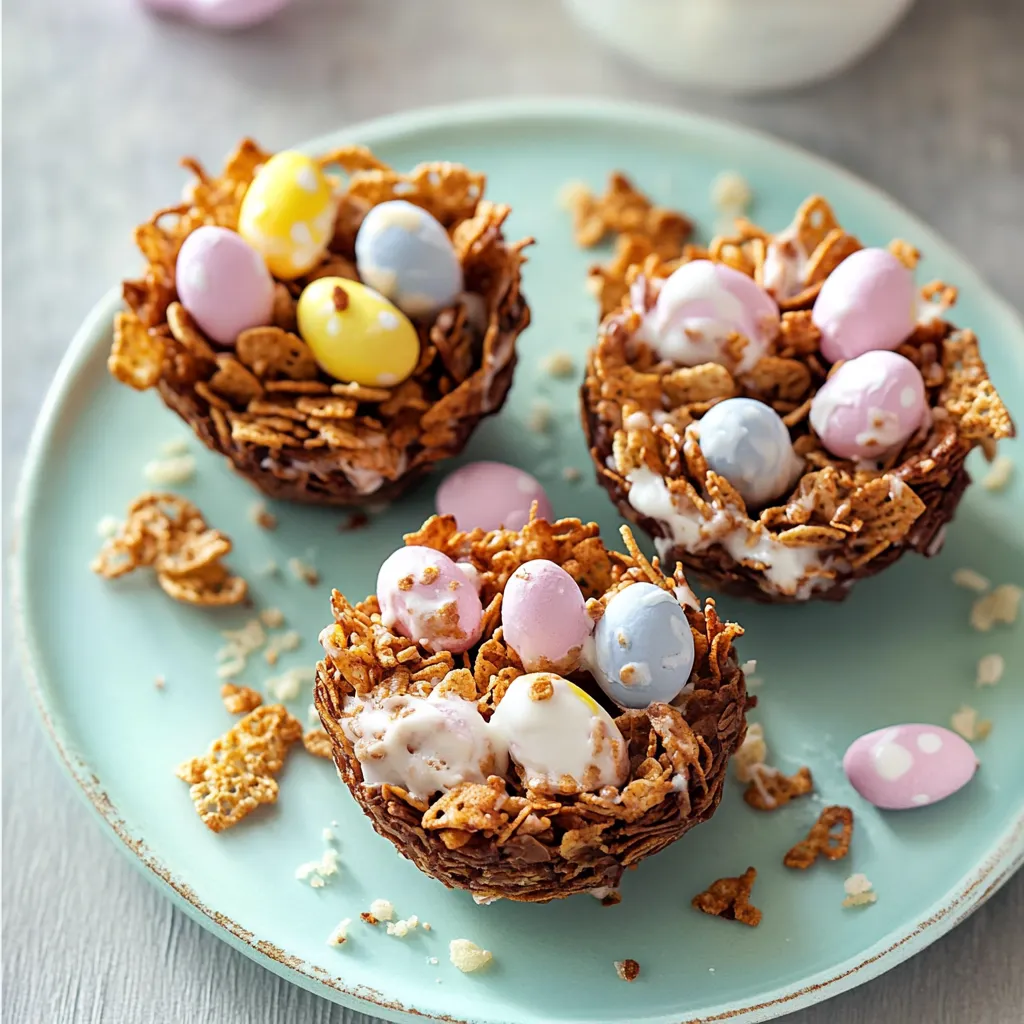
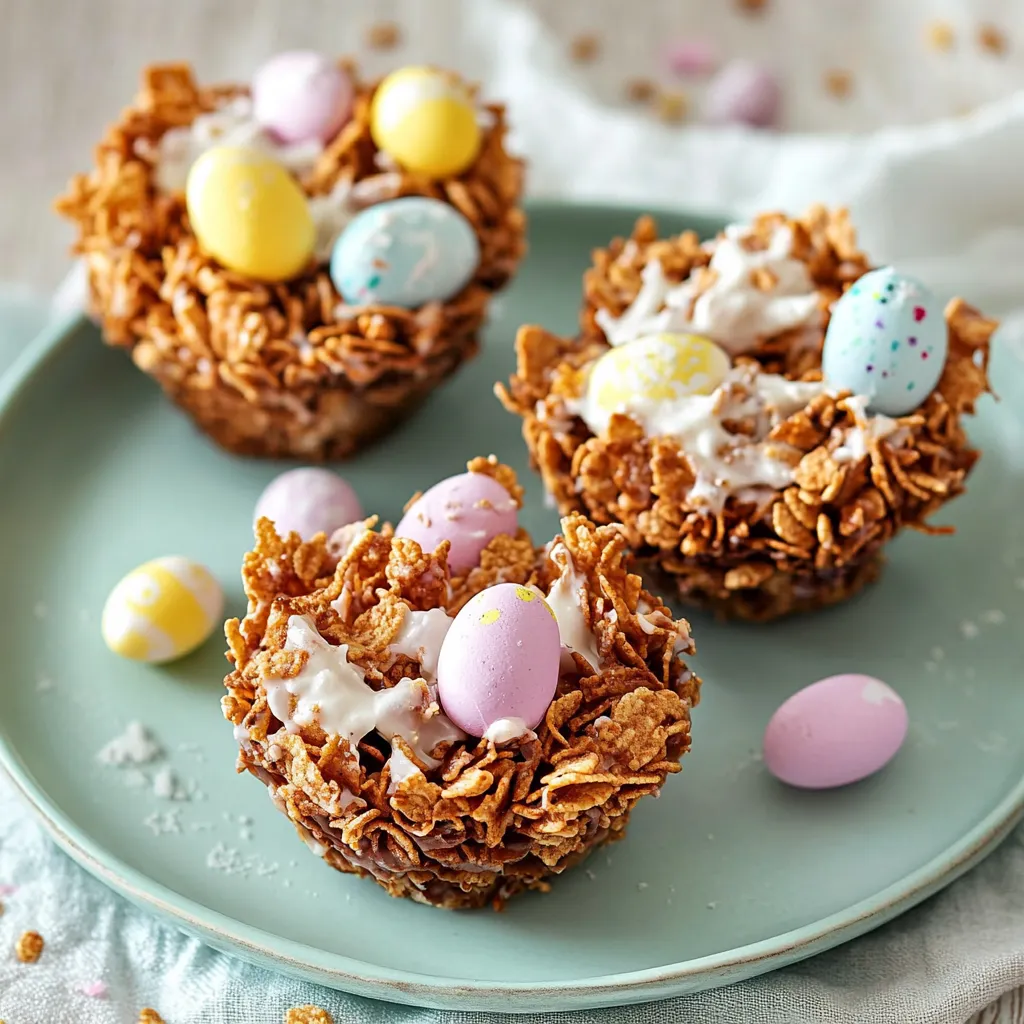
Childhood Easter memories come alive with these delightful chocolate cornflake nests. The satisfying crunch of cornflakes coated in smooth chocolate creates the perfect base for colorful candy eggs. This simple recipe requires minimal ingredients yet delivers maximum impact on your holiday table, making it ideal for last-minute preparations when time runs short but expectations remain high.
Making these nests has become something of a tradition in our family. Last Easter, my five-year-old niece insisted on making them herself with just a bit of supervision. Her little hands worked so carefully placing each candy egg, and her proud smile when we displayed them at our family gathering was worth every bit of the chocolate smeared across my kitchen counters.
Nest Building Materials
- Cornflakes (3 cups): Create the fundamental structure of each nest with their natural ridges and curves. Select packages with minimal broken pieces for the most realistic nest appearance.
- Milk Chocolate (1¼ cups): Serves as the delicious glue binding everything together. Look for bars containing at least 30% cocoa solids for superior flavor depth and smooth melting properties.
- Unsalted Butter (3 tablespoons): Provides richness and creates the perfect consistency. Choose European-style butter with higher fat content for luxurious mouthfeel.
- Clear Honey (2 tablespoons): Contributes subtle floral notes and creates an attractive glossy finish. Select mild varieties like clover or orange blossom.
- Mini Eggs (36 pieces): Complete the magical transformation from cereal to seasonal masterpiece. Choose eggs with varied but complementary colors for the most appealing presentation.
I discovered the magic of adding honey to chocolate cornflake nests quite by accident when I ran short of golden syrup one Easter. The subtle flavor enhancement was so wonderful that it became my standard approach. My husband now requests these treats year-round, but I save them exclusively for our Easter celebrations to maintain their special holiday status.
Chocolate Nest Creation
- Muffin Tin Preparation:
- Line a standard 12-cup muffin tin with paper liners ensuring they sit properly in each cavity. This guarantees easy removal once nests have set.
- Melting Chocolate Perfectly:
- Combine chopped chocolate pieces with butter and honey in a heatproof bowl for melting. Use a double boiler setup and stir continuously until smooth.
- Coating Cornflakes Thoroughly:
- Pour cornflakes into the melted chocolate mixture and gently fold until evenly coated.
- Forming Perfect Nests:
- Transfer spoonfuls of coated cornflakes into prepared muffin liners, shaping them into nest-like structures with a spoon.
- Adding Decorative Eggs:
- Place mini eggs in each nest depression while chocolate is still soft, pressing gently for adherence.
- Chilling Until Set:
- Refrigerate nests for at least one hour until fully set before serving.
 Pin it
The first time I made these nests twenty years ago, I tried to rush the chilling process by placing them in the freezer. The rapid temperature change caused the chocolate to develop a white bloom that, while harmless, looked unappealing. Now I patiently allow them to set naturally in the refrigerator, knowing that good things truly come to those who wait. My mother still reminds me of this kitchen disaster whenever Easter approaches.
Delightful Presentation
Creating visual impact matters almost as much as flavor when presenting these nostalgic Easter treats. Consider arranging nests on a bed of green-tinted coconut 'grass' on a serving platter for a festive display. Varying the height of some nests using cake stands or inverted glasses adds dimensional interest to your Easter dessert table. Group nests in odd numbers for the most aesthetically pleasing arrangement. The classic presentation includes three pastel-colored eggs per nest, but small wrapped chocolate eggs or jelly beans work beautifully as alternatives. For children, adding a tiny yellow chick figure beside each nest creates an enchanting scene they will remember long after the treats disappear.
Flavor Variations
Personalizing these classic nests allows you to create signature versions your family will request year after year. White chocolate creates exceptionally festive-looking nests that contrast beautifully with colorful eggs. Adding orange or lemon zest to the melting chocolate introduces bright citrus notes that complement the spring season perfectly. Dark chocolate with a sprinkle of sea salt offers a sophisticated variation for adult palates while maintaining the whimsical appearance. Incorporating finely chopped dried fruits like cranberries or apricots adds chewy texture contrast and vibrant color pops throughout the nests. These simple adaptations keep a traditional favorite feeling fresh and exciting each Easter season.
Storage Success
To maintain their crunch and flavor, store completely cooled nests in a single layer inside an airtight container. This helps prevent the chocolate from absorbing any unwanted refrigerator odors while keeping the cornflakes crisp. If you need to stack the nests, place a sheet of parchment paper between each layer to prevent sticking.
In warmer climates, refrigeration is recommended to keep the chocolate firm and the nests structurally sound. However, allow them to sit at room temperature for about 10 minutes before serving to bring out their full flavor. If storing for more than a few days, consider placing them in a cool, dry pantry away from direct sunlight instead of the refrigerator to prevent condensation from forming on the chocolate.
While freezing is not ideal, it is possible to freeze these nests for longer storage. Wrap each one individually in plastic wrap before placing them in an airtight container or freezer bag. When ready to enjoy, let them thaw at room temperature to prevent moisture buildup that can affect their texture.
 Pin it
I began making these chocolate cornflake nests when my children were small, now they create them with their own families each Easter. There remains something profoundly satisfying about transforming simple ingredients into treats that spark joy across generations. The tradition connects us even when distance separates our family gatherings, knowing we each enjoy the same beloved recipe that has graced our Easter celebrations for decades.
Frequently Asked Questions
- → Can I use a different type of cereal for these Chocolate Easter Nests?
- Yes, you can substitute cornflakes with other cereals like Rice Krispies, Shredded Wheat (broken into pieces), or even chow mein noodles for a different texture and appearance.
- → How long do these Chocolate Easter Nests keep?
- When stored in an airtight container, these nests will keep for up to 5 days at room temperature or up to 2 weeks in the refrigerator. In warm weather, refrigeration is recommended to prevent melting.
- → What can I use instead of mini eggs for these nests?
- You can substitute mini eggs with jelly beans, small chocolate eggs, Jordan almonds, or even colorful candy-coated sunflower seeds for a different look but same festive appeal.
- → Why is my chocolate mixture too thick or not coating properly?
- If your mixture is too thick, add an additional tablespoon of butter to thin it. Make sure you're stirring gently to avoid crushing the cornflakes while ensuring they're evenly coated.
- → Can I make these Chocolate Easter Nests vegan?
- Yes, use dairy-free chocolate, plant-based butter, and maple syrup instead of honey. For the topping, choose vegan candy or dried fruits shaped into egg-like forms.