Cheese Bunny Breadsticks

Featured in: Fresh-Baked Happiness from Your Oven

Cheese Bunny Breadsticks transform a simple homemade bread dough into charming, bunny-shaped treats that are perfect for special occasions or adding whimsy to everyday meals. This recipe starts with a basic yeast dough that comes together quickly with common pantry ingredients. After a brief rise, the dough is divided and skillfully shaped into adorable bunny forms with distinctive ears. What makes these breadsticks special is the hidden surprise inside - pockets of melty mozzarella cheese that create a delightful cheesy pull when served warm. The exterior gets a beautiful golden sheen from an egg wash, while a sprinkle of sesame seeds adds texture and visual appeal. These bunny breadsticks are not only cute but also delicious, offering a perfect blend of soft bread and gooey cheese. They're ideal for Easter gatherings, spring celebrations, children's parties, or anytime you want to bring a smile to the table with a playful yet tasty bread option.
marry from tastelikemagic.com
Updated on Tue, 18 Mar 2025 01:00:22 GMT
A plate of baked rabbit shaped bread. Pin it
A plate of baked rabbit shaped bread. | tastelikemagic.com

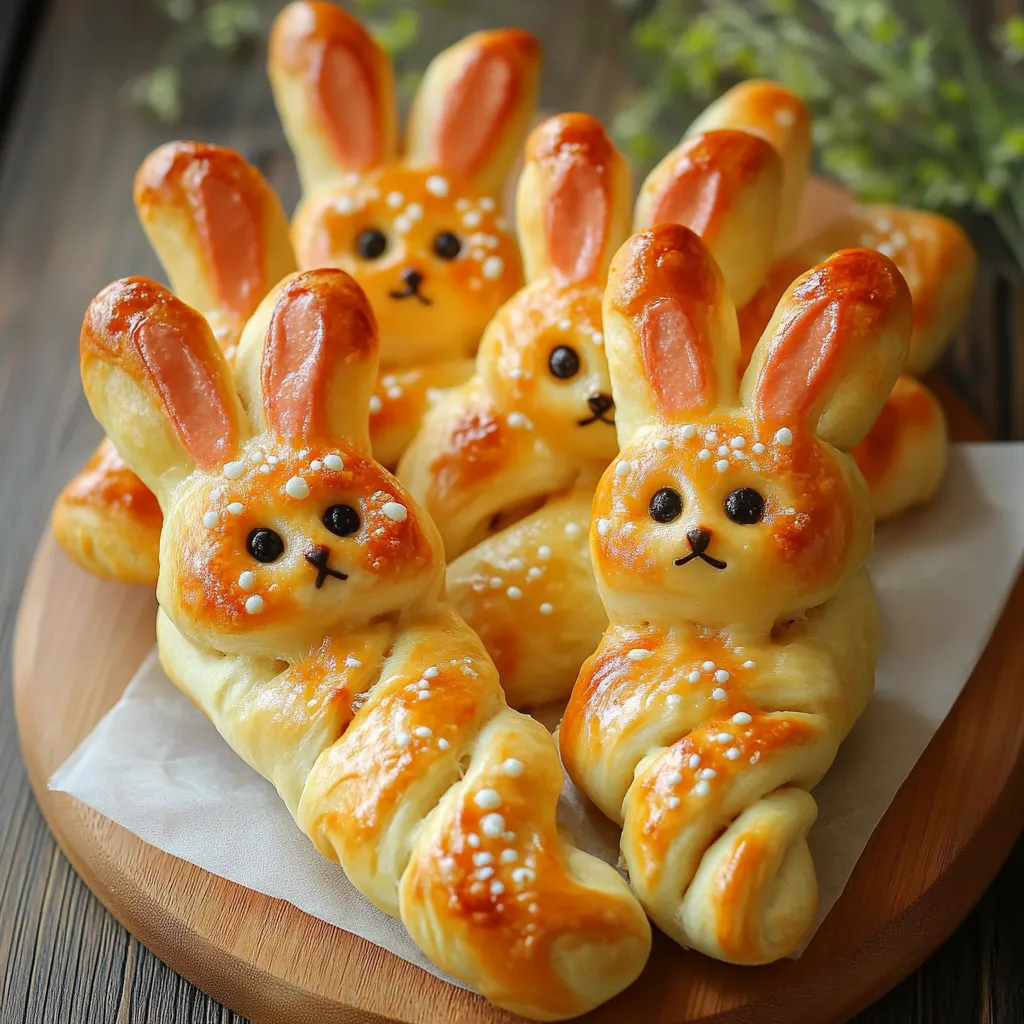
These Cheesy Easter Bunny Breadsticks bring playfulness and flavor to your holiday table with their adorable shape and satisfying cheesy center. The warm, fluffy dough wrapped around pockets of melted mozzarella creates that perfect pull-apart texture that both children and adults find irresistible. Finished with a golden egg wash and a sprinkle of sesame seeds, these bunny-shaped treats balance whimsy with genuine culinary appeal – making them the star of your Easter spread.

I made these bunny breadsticks for my niece's Easter celebration last year, and they were the first thing to disappear from the buffet table. My brother-in-law, who usually heads straight for the honey ham, actually asked if there were more breadsticks hiding in the kitchen. There's something about the combination of freshly baked bread and melty cheese that brings out everyone's inner child – even the adults couldn't resist these cute little bunnies.

Key Ingredients

  • Sugar (1 tbsp): Helps activate the yeast and lightly enhances the flavor.
  • Warm Water (1 Cup, Around 110°F): Provides the right temperature for yeast activation.
  • Active Dry Yeast (2¼ tsp, One Standard Packet): Ensures a soft, airy rise.
  • All-Purpose Flour (3 Cups): Forms the dough’s base with the perfect balance of chewiness.
  • Salt (1 tsp): Enhances flavor and strengthens the dough structure.
  • Olive Oil (2 tbsp): Adds moisture, flavor, and a tender crumb.
  • Mozzarella Cheese (4 oz, Cut into Small Pieces): Melts into a creamy, gooey center.
  • Egg (1, Beaten): Creates a golden, glossy crust when brushed on top.
  • Sesame Seeds (1 tbsp): Add a nutty crunch and enhance the appearance.
  • Optional - Garlic Powder (1 tsp): Adds an extra layer of savory depth.

Step-by-Step Instructions

Activate the Yeast:
Dissolve sugar in warm water, sprinkle yeast, and let sit until foamy (about 5 minutes).
Form the Dough:
Mix flour, salt, and garlic powder in a bowl. Add yeast mixture and olive oil, then knead until smooth (about 5-7 minutes).
First Rise:
Place dough in a lightly oiled bowl, cover, and let rise in a warm area until doubled in size (about 30 minutes).
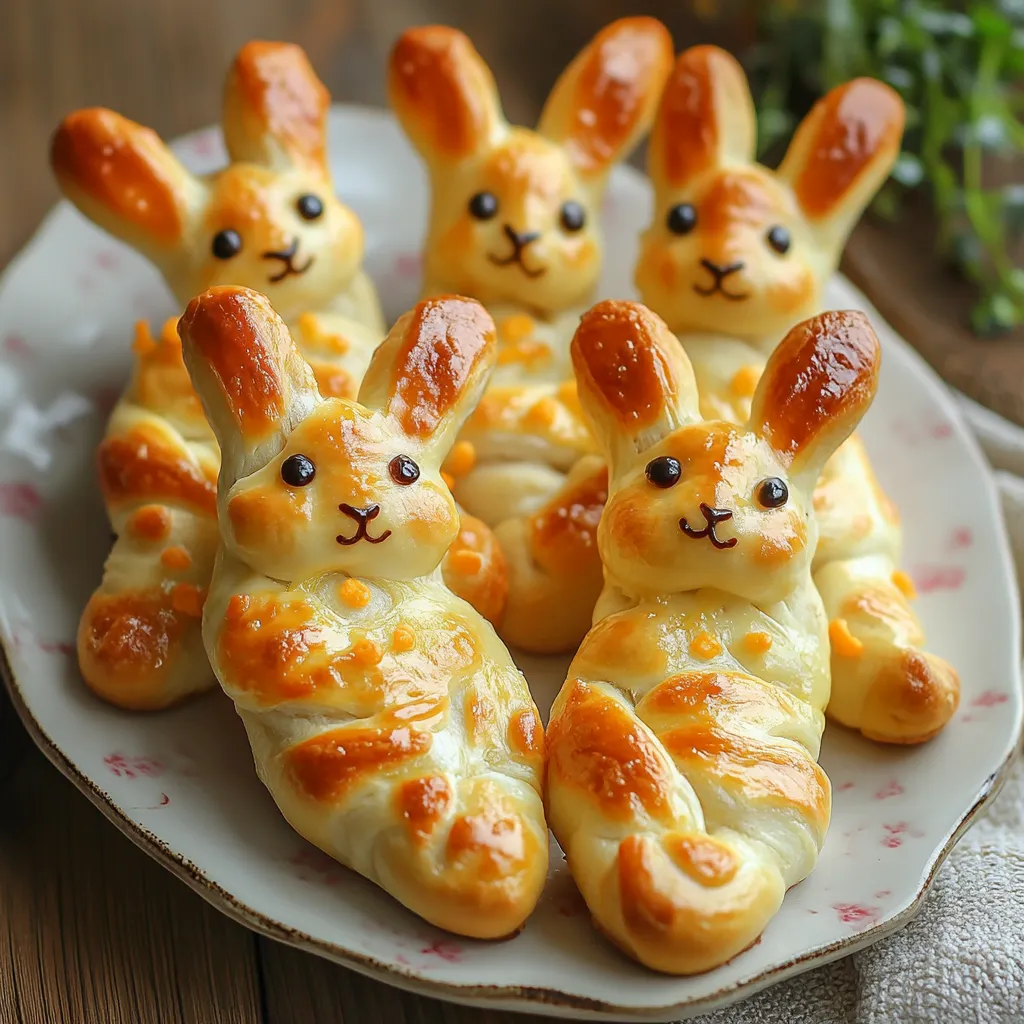
Shape the Bunnies:
Divide dough into 12 equal pieces. Roll each into an 8-inch rope, fold, twist once, and shape into bunny ears.
Add the Cheese:
Insert small mozzarella pieces in the center of each bunny shape, pinching the dough around to seal.
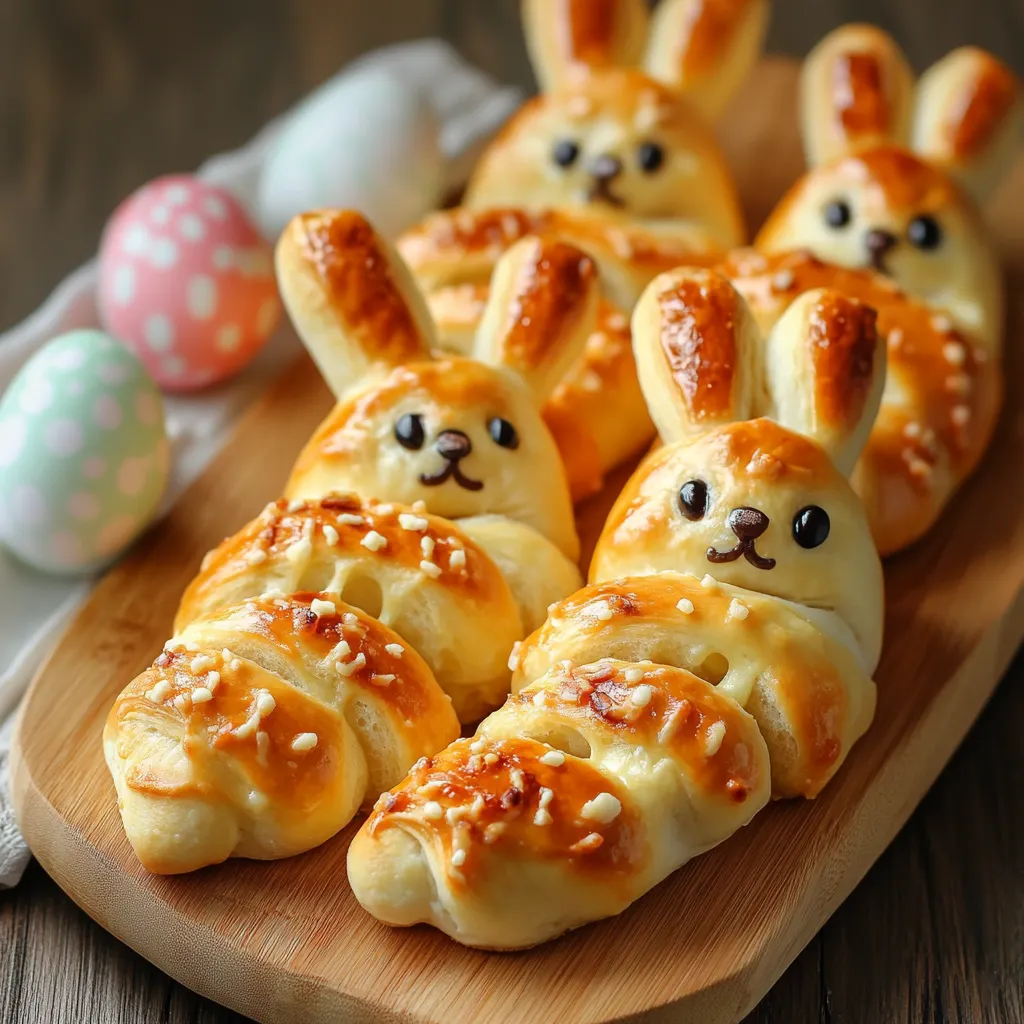
Final Touches and Baking:
Brush with egg wash, sprinkle with sesame seeds, and bake at 375°F (190°C) for 12-15 minutes until golden brown.
Cool and Serve:
Let cool for 5 minutes before serving with dipping sauces.
A plate of baked rabbit shaped pastries. Pin it
A plate of baked rabbit shaped pastries. | tastelikemagic.com

Beyond Easter

While designed as an Easter treat, these breadsticks have become a requested item throughout the year at our house. We simply shape them differently – twisted sticks for everyday meals, knots for casual gatherings, and special shapes for other holidays.

A Teaching Tool

Making these breadsticks has become an unexpected educational opportunity with my children. Rolling the dough teaches fine motor skills, while counting and dividing the portions incorporates math. Even patience gets practiced while waiting for the dough to double in size.

Entertaining Made Easy

These bunny breadsticks have saved me during many holiday gatherings when I needed something special yet manageable. Unlike complicated dishes, these can be shaped earlier in the day and refrigerated, then baked just before serving.

Personalized Variations

Over the years, I've developed several variations on this basic recipe to suit different taste preferences. For herb-lovers, I knead finely chopped rosemary and thyme into the dough. For spice enthusiasts, I add cayenne and crushed red pepper.

Bunny shaped bread with eyes and a nose. Pin it
Bunny shaped bread with eyes and a nose. | tastelikemagic.com

I created this recipe when my daughter came home from preschool announcing that the Easter Bunny would surely want something special to eat during his busy night of hiding eggs. What started as a whimsical response to a child's imagination has become one of our most cherished holiday traditions.

Frequently Asked Questions

→ Can I make the dough ahead of time?
Yes, you can prepare the dough up to 24 hours ahead and store it in the refrigerator. Punch it down after the first rise, cover tightly, and refrigerate. When ready to use, let it sit at room temperature for about 30 minutes before shaping into bunnies.
→ What other cheeses can I use for the filling?
While mozzarella provides the best melty texture, you can experiment with cheddar, Monterey Jack, or a cheese blend. For more flavor, try adding a small amount of cream cheese or a sprinkle of Parmesan with the mozzarella.
→ How do I shape the dough into bunnies?
Roll each piece of dough into a rope about 10 inches long. Fold it in half, then twist the two strands together, leaving a small loop at the fold. Shape the loop into ears by pinching it into two sections, then slightly flattening and rounding the opposite end for the body.
→ Can I freeze these bunny breadsticks?
Yes, you can freeze them either before or after baking. To freeze before baking, shape the bunnies, place on a baking sheet until frozen solid, then transfer to a freezer bag. Thaw and rise before baking. For baked breadsticks, cool completely, freeze in a single layer, then store in a freezer container for up to 3 months.
→ What can I serve with these bunny breadsticks?
These breadsticks pair wonderfully with marinara or pizza sauce for dipping. They also complement soups, salads, or pasta dishes. For a fun children's meal, serve them alongside vegetable sticks with hummus or ranch dressing.

Cheese Bunny Breadsticks

These Cheese Bunny Breadsticks feature soft homemade dough shaped into cute bunnies with mozzarella cheese hidden inside for a fun and tasty treat.

Prep Time
45 Minutes
Cook Time
15 Minutes
Total Time
60 Minutes
By: Marry

Category: Homemade Bakes

Difficulty: Intermediate

Cuisine: Italian-inspired

Yield: 12 Servings (12 bunny breadsticks)

Dietary: Vegetarian

Ingredients

→ For the Dough

01 2 cups all-purpose flour
02 1 packet (2 ¼ teaspoons) active dry yeast
03 1 cup warm water (110°F)
04 1 teaspoon sugar
05 1 teaspoon salt
06 2 tablespoons olive oil

→ For Filling and Decoration

07 1 cup shredded mozzarella cheese
08 1 egg (for egg wash)
09 Sesame seeds (for sprinkling on top)

Instructions

Step 01

Let's start by waking up our yeast! In a small bowl, pour in your cup of warm water - it should feel like warm bath water, around 110°F. If it's too hot, you'll kill the yeast, and if it's too cold, they'll stay sleepy. Stir in that teaspoon of sugar (yeast loves sugar - it's their favorite food!), then sprinkle your yeast over the top. Now let it sit for about 5 minutes until it gets all foamy and frothy. That bubbling action is how you know your yeast is alive and ready to help your dough rise!

Step 02

In a large mixing bowl, combine your flour and salt, then add the olive oil. Make a little well in the center - think of it as a cozy pool for your yeast mixture. Pour your now-frothy yeast water into this well and start stirring everything together. As the mixture comes together, it'll form a shaggy dough. Turn it out onto a lightly floured surface and roll up your sleeves - it's kneading time! Work that dough for about 5-7 minutes, pushing and folding it until it becomes smooth and elastic. When you poke it with your finger, it should slowly spring back - that's when you know it's ready!

Step 03

Grab a clean bowl and give it a light coating of oil. Place your beautiful ball of dough inside, then cover it with a damp kitchen towel. Find a nice warm spot in your kitchen for it to rest - near a sunny window or on top of a just-barely-warm oven works great. Let it hang out there for about 30 minutes, during which time it should double in size. It's like magic watching it grow! This rising time is what gives your breadsticks that light, airy texture that makes them so irresistible.

Step 04

Once your dough has doubled in size, it's time to punch it down (gently, of course) to release the air bubbles. Now divide it into 12 equal pieces - I find it easiest to first cut it in half, then each half into 6 pieces. Roll each piece into a long, thin rope, about 8-10 inches long. Now for the fun part - let's make our bunny shapes! Fold each rope in half, then twist the two strands together, leaving a little loop at the top. Split the top loop to create two pointy ears. Arrange your bunny shapes on a parchment-lined baking sheet, making sure to leave some space between them as they'll expand while baking.

Step 05

Now let's make these bunnies extra special with a surprise inside! Take your shredded mozzarella and tuck small portions into the center of each bunny breadstick. You can gently lift parts of the dough or create small pockets to nestle the cheese inside. Don't worry if it's not perfect - as the breadsticks bake, the cheese will melt into delicious little pockets throughout the dough.

Step 06

Preheat your oven to 375°F (190°C) while you finish preparing your bunnies. Beat your egg in a small bowl to create an egg wash, then use a pastry brush to gently coat each bunny breadstick. This will give them that beautiful golden-brown shine when baked. Sprinkle some sesame seeds on top for that perfect finishing touch and added texture. The seeds also help create the illusion of a bunny's furry coat!

Step 07

Slide your tray of bunny breadsticks into the preheated oven and bake for 12-15 minutes. Keep an eye on them - you're looking for a lovely golden-brown color. Your kitchen will start to fill with the most amazing fresh-baked bread smell! Once they're done, take them out and let them cool on the baking sheet for just a few minutes. The cheese inside will be molten hot at first, so giving them a brief cooling period makes them easier (and safer) to handle.

Step 08

These adorable bunny breadsticks are best served while still warm, when the cheese inside is all gooey and stretchy. They make a perfect accompaniment to soups or pasta dishes, or just enjoy them on their own as a fun snack or appetizer. Kids and adults alike will be delighted by both their cute appearance and delicious taste! If you have any leftovers (though I doubt you will), store them in an airtight container and reheat briefly in the oven to restore their freshness.

Notes

  1. These adorable Cheesy Bunny Breadsticks are perfect for Easter gatherings, spring celebrations, or anytime you want to add a touch of whimsy to your meal.
  2. The dough can be made a day ahead and stored in the refrigerator - just let it come to room temperature for about 30 minutes before shaping the bunnies.
  3. Feel free to experiment with different cheeses or add herbs like rosemary or thyme to the dough for additional flavor variations.
  4. For a fun activity with kids, let them help shape their own bunny breadsticks - they'll love being part of the creative process!

Tools You'll Need

  • Large mixing bowl
  • Small bowl for yeast activation
  • Measuring cups and spoons
  • Baking sheet
  • Parchment paper
  • Pastry brush

Allergy Information

Please check ingredients for potential allergens and consult a health professional if in doubt.
  • Contains gluten (all-purpose flour)
  • Contains dairy (mozzarella cheese)
  • Contains eggs (egg wash)

Nutrition Facts (Per Serving)

It is important to consider this information as approximate and not to use it as definitive health advice.
  • Calories: 165
  • Total Fat: 7 g
  • Total Carbohydrate: 20 g
  • Protein: 6 g